Inviting Userlytics testers to Testflight is very easy. All you have to do is use a public link. Here are the steps to follow:
- Go to App Store Connect
- Click on My Apps and then on the app you want to test
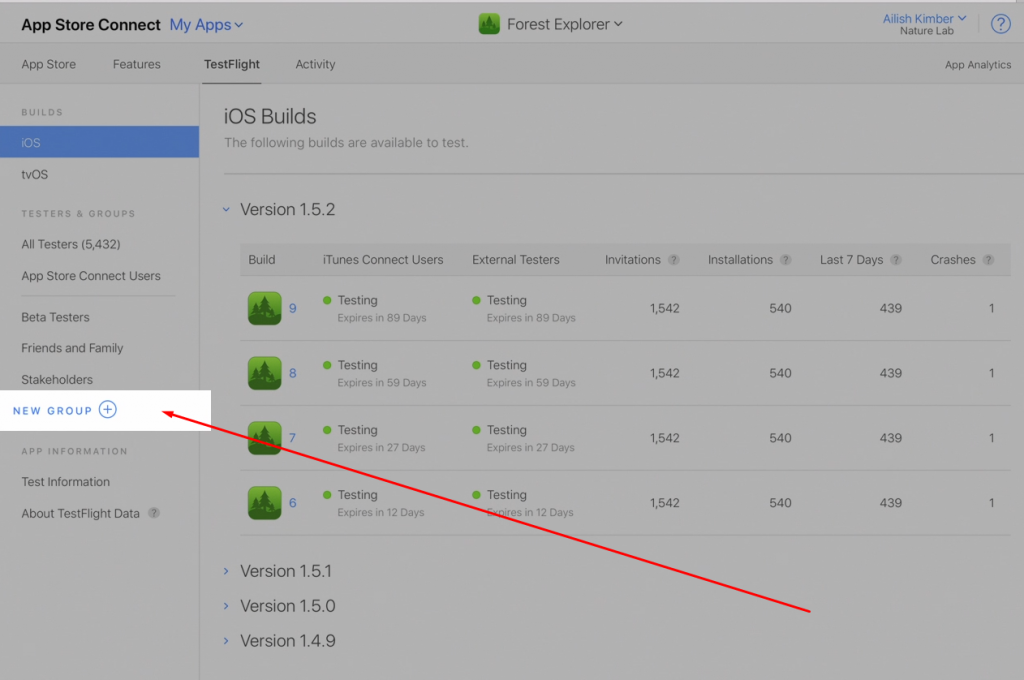
- First, you need to create a group before you can generate a public link. You can do that by clicking on TestFlight and then New Group on the left-sided menu.
- Then give a name to the group and click on OK.

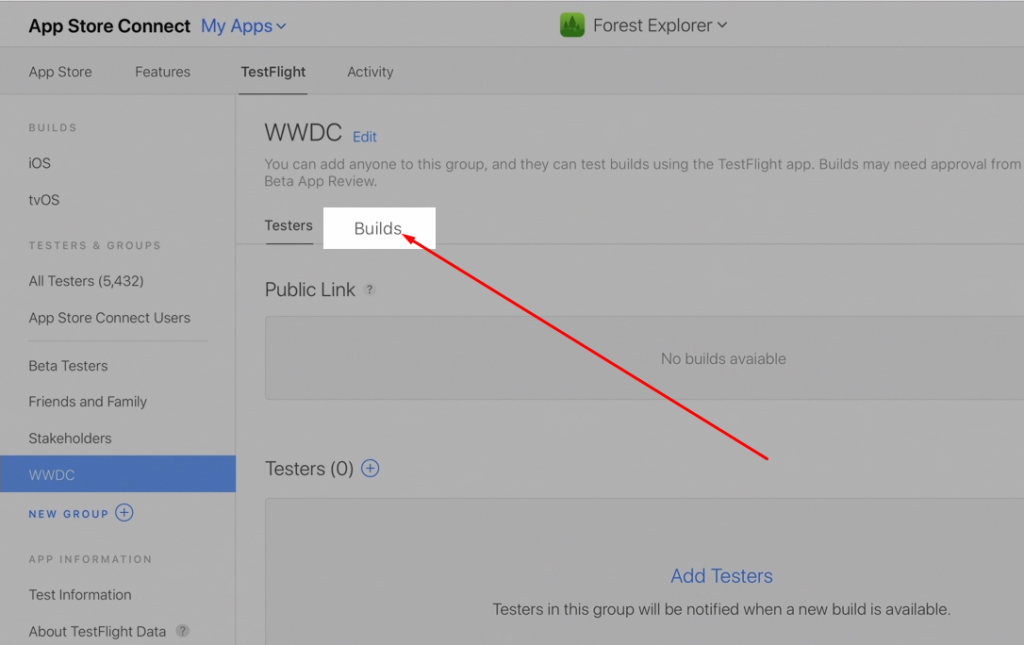
- Then, Click on Builds to select (or create if you don’t have one) a build in order to use the public link method.
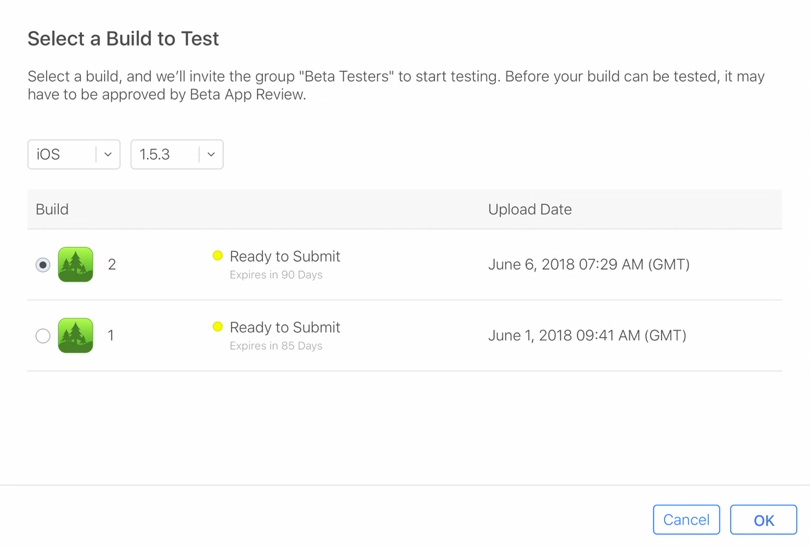
- Now select the 'Build' you want testers to test and click OK .
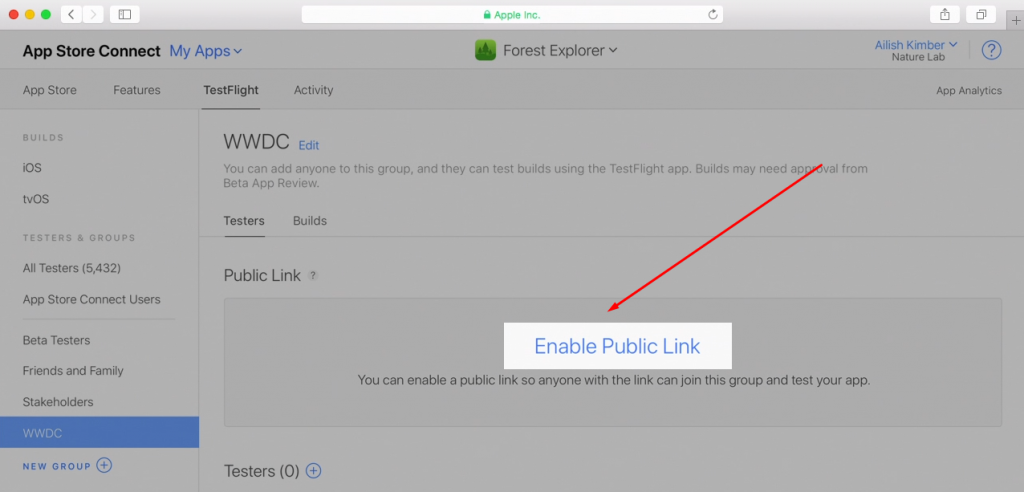
- Now, you will be able to enable the public link method. Go back to the tester’s tab, and click on Enable Public Link. This will generate a unique link.
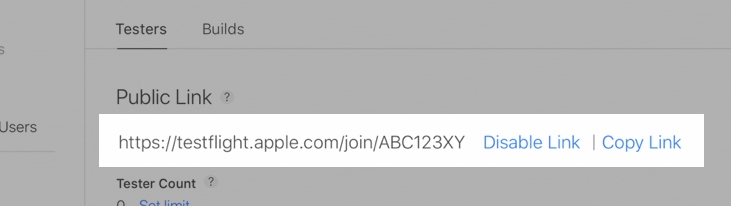
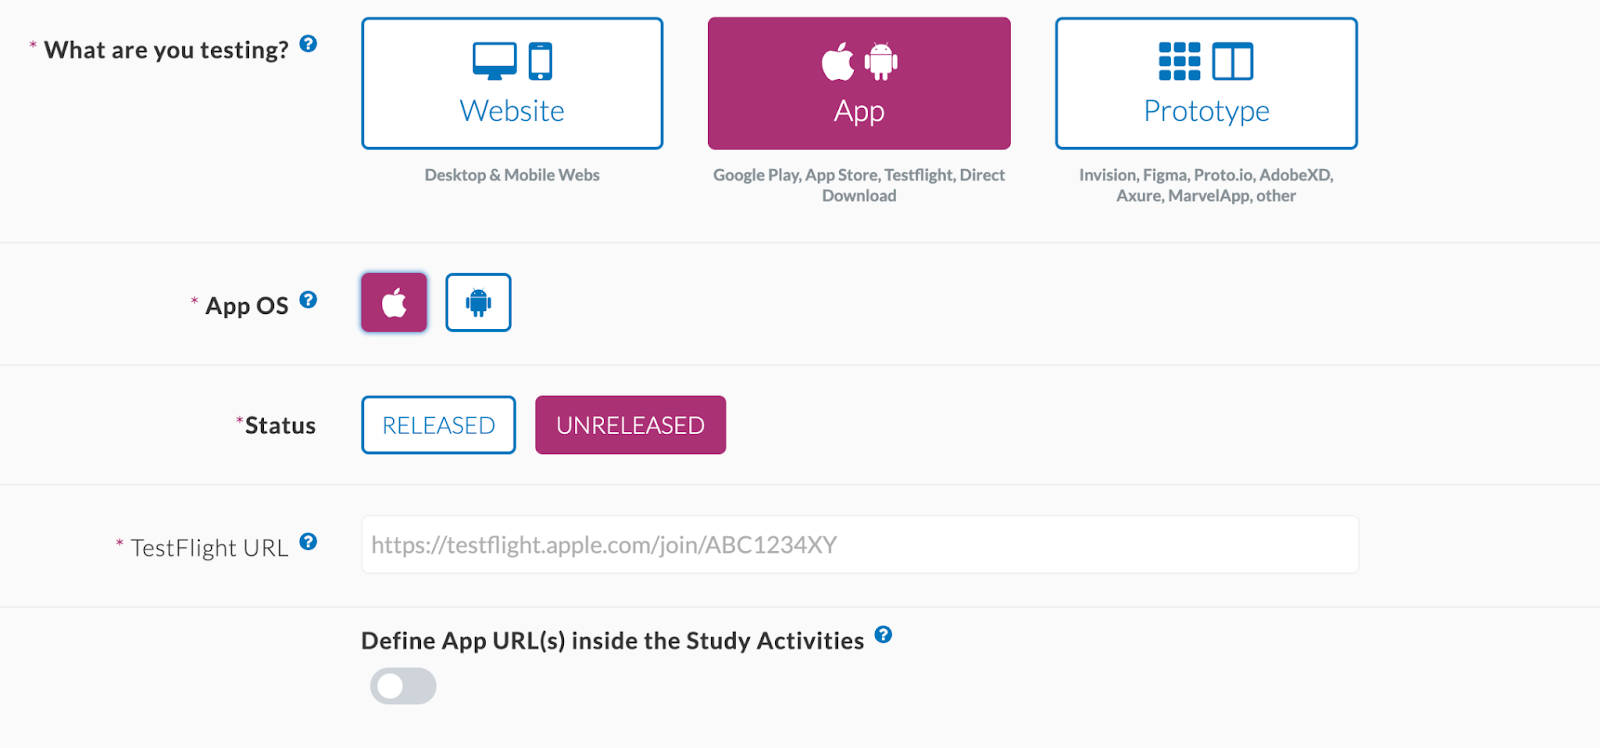
Copy the link, then paste it into the “Testflight URL” section of the test you’re setting up in the Userlytics Dashboard.
Add a Screener Question to Ensure Testers Have TestFlight Installed
To make sure participants are ready:
-
In the Screener Questions section of your test setup, add a question like:
“Have you installed the TestFlight app and accessed the provided link?”
-
Yes
-
No (Please install TestFlight and access the app before continuing)
-
This ensures only qualified participants continue to the main tasks.
Illustration: Adding a screener question in the Userlytics test builder.
Final Review and Launch
Before launching:
-
Double-check your TestFlight build is approved and "Ready for Testing"
-
Make sure your public link is active and unrestricted
-
Confirm your Userlytics test settings, including instructions, tasks, and demographics
Once everything looks good, hit Launch Test and let Userlytics recruit participants.
Note: Testers must have the TestFlight app installed on their iOS device to use the public link and download your app. Make sure your build complies with Apple’s beta testing guidelines.